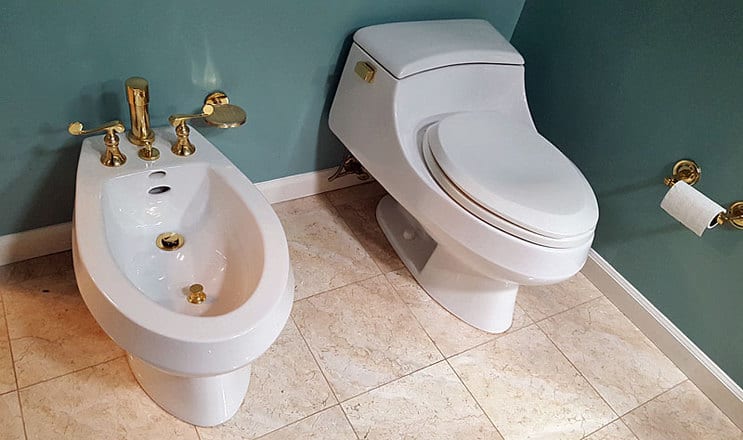
The bidet has been a common fixture in European bathrooms for centuries; the first models were developed for French royalty in the early 1700s.
Today, many master baths in the U.S. also have this additional fixture, and manufacturers have a number of different models to choose from. Installing a bidet requires basic plumbing tools and some skill in carpentry and plumbing.
It Looks Like a Toilet, But…
Although looking superficially like a toilet, the installation of a bidet is substantially different than that of the more common bathroom fixture. The first consideration in a remodeling project is whether the bathroom has enough room.
A bidet requires as much space as a toilet, a minimum of 30 inches in width, and considering the room in front of the fixture, nearly 4 feet in depth. Free-standing bidets (as opposed to bidet-seats that mount on a regular toilet) come in two configurations: Wall-mounted or floor-mounted. Many of the installation details are the same.
Plumbing Requirements of a Bidet
Because bidets have mixing valves similar to faucets that allow you to adjust the rinse water to a comfortable temperature, another requirement is both a hot and cold-water supply. Additionally, the plumbing code requires what’s called a “vacuum breaker” to be used with bidet supplies.
Vacuum breakers prevent water from being siphoned back into the supply system and causing contamination. Most bidets have an integral vacuum breaker, but it’s smart to confirm this before you buy your bidet. If one is lacking, instead of standard shut offs at the wall, you can buy ones that have a vacuum breaker.
Another difference between installing a bidet and installing a toilet is the size and configuration of the waste line. Toilets have internal traps to prevent sewer gases from escaping into occupied spaces. Bidets don’t, and a trap must be installed in the rough plumbing below the floor. Also, because bidets are used for rinsing only and not for solid waste, their drains are typically only 1 1/2 inch in diameter, compared to the 3-inch drain pipes most toilets use. In fact, the drain assembly for a bidet is more like that for a shower or bathtub than a toilet.
Installing Wall- and Floor-Mounted Bidets
Wall-mounted bidets require a special frame to be installed in the wall prior to drywall and tile. Mounting bolts attached to this frame protrude from the wall, and all the plumbing connections are made at the wall. A special drain connection is used that seals when the drain from the bidet is pushed in. The drain of a floor-mounted bidet is always in the floor, but the supplies might come out of the floor or the wall. In every case, it’s important to review the plumbing layout in the bidet’s installation instructions and make certain the rough plumbing is exactly where it’s supposed to be.
With the floor and wall finishes completed and the stop valves installed on the rough plumbing supplies, you can begin to actually install the bidet now. The location of a wall-mounted unit is determined by the previously installed bolts. Floor-mounted units are affixed using hanger bolts, which have a lag thread on one end and a machine thread on the other. Locate and predrill the holes for these bolts using a template (if one is supplied) or by positioning the bidet so its drain hole aligns with the trap and waste pipe in the floor.
Since installation procedures vary for different bidets, make sure to read the manufacturer’s instructions before you start. In most cases, it’s easier to lay out and install supply lines before mounting the bidet to wall or floor.
Wall-mounted bides are trickier to install then floor-mounted models. Some wall-mounted units have special hardware that threads onto the bolts before the bidet is mounted, while others simply use nuts and washers. In either case, you’ll be supporting the bidet from above while securing the mounting bolts by feel from below. As you’re placing the bidet on the bolts, the drain must be aligned with that in the rough plumbing, and everything is pushed home at once. A helper can make a difference here.
Floor-mounted bidets are placed over the bolts you’ve threaded into the floor and held down with nuts and washers, much like a toilet. The drain assembly is placed into the hole in the bidet from above, and the drain connections are tightened by way of an access hole in the back of the bidet.
The final steps are attaching the flexible supplies to the shutoffs. Check for leaks, fix any you may find, and then caulk the bidet to the wall or floor with a neat bead of silicone sealant.
The Bidet Seat Option
If you don’t have room for a dedicated unit, a bidet-seat for your toilet is an option. There are two common snags. First, bidets use more water than toilets do, so standard 3/8-inch toilet shutoffs have to be replaced with 1/2-inch ones. This may require knowing how to solder pipe. Second, because there won’t be a hot water supply at the toilet, bidet-seats have integral electric heaters. There needs to be a GFCI-protected outlet nearby.
If you have those things, then the installation is a matter of removing the existing toilet seat and installing the base for the bidet-seat in its place. Water is connected to the base from the shut-off via a flexible supply, and the heater is plugged in.
Then, the bidet seat is mounted to its base according to that manufacturer’s instructions.
As they say in France, “Eh voila, you have a bidet.”


